


Spring Boot makes it easy to create stand-alone, production-grade Spring based Applications that you can "just run". Spring boot is an opinionated framework that pulls together the best parts of Spring and allows you build web applications really quickly. Through out this blog we would be taking a look at how to set up and build Spring Boot applications.
Requirements
- IntelliJ
- Knowledge of Kotlin
Setup
In order to set you up fast, Spring provides a code generator that sets up our project for us. This tool is available at https://start.spring.io
Follow these steps to setup a minimal Spring boot project:
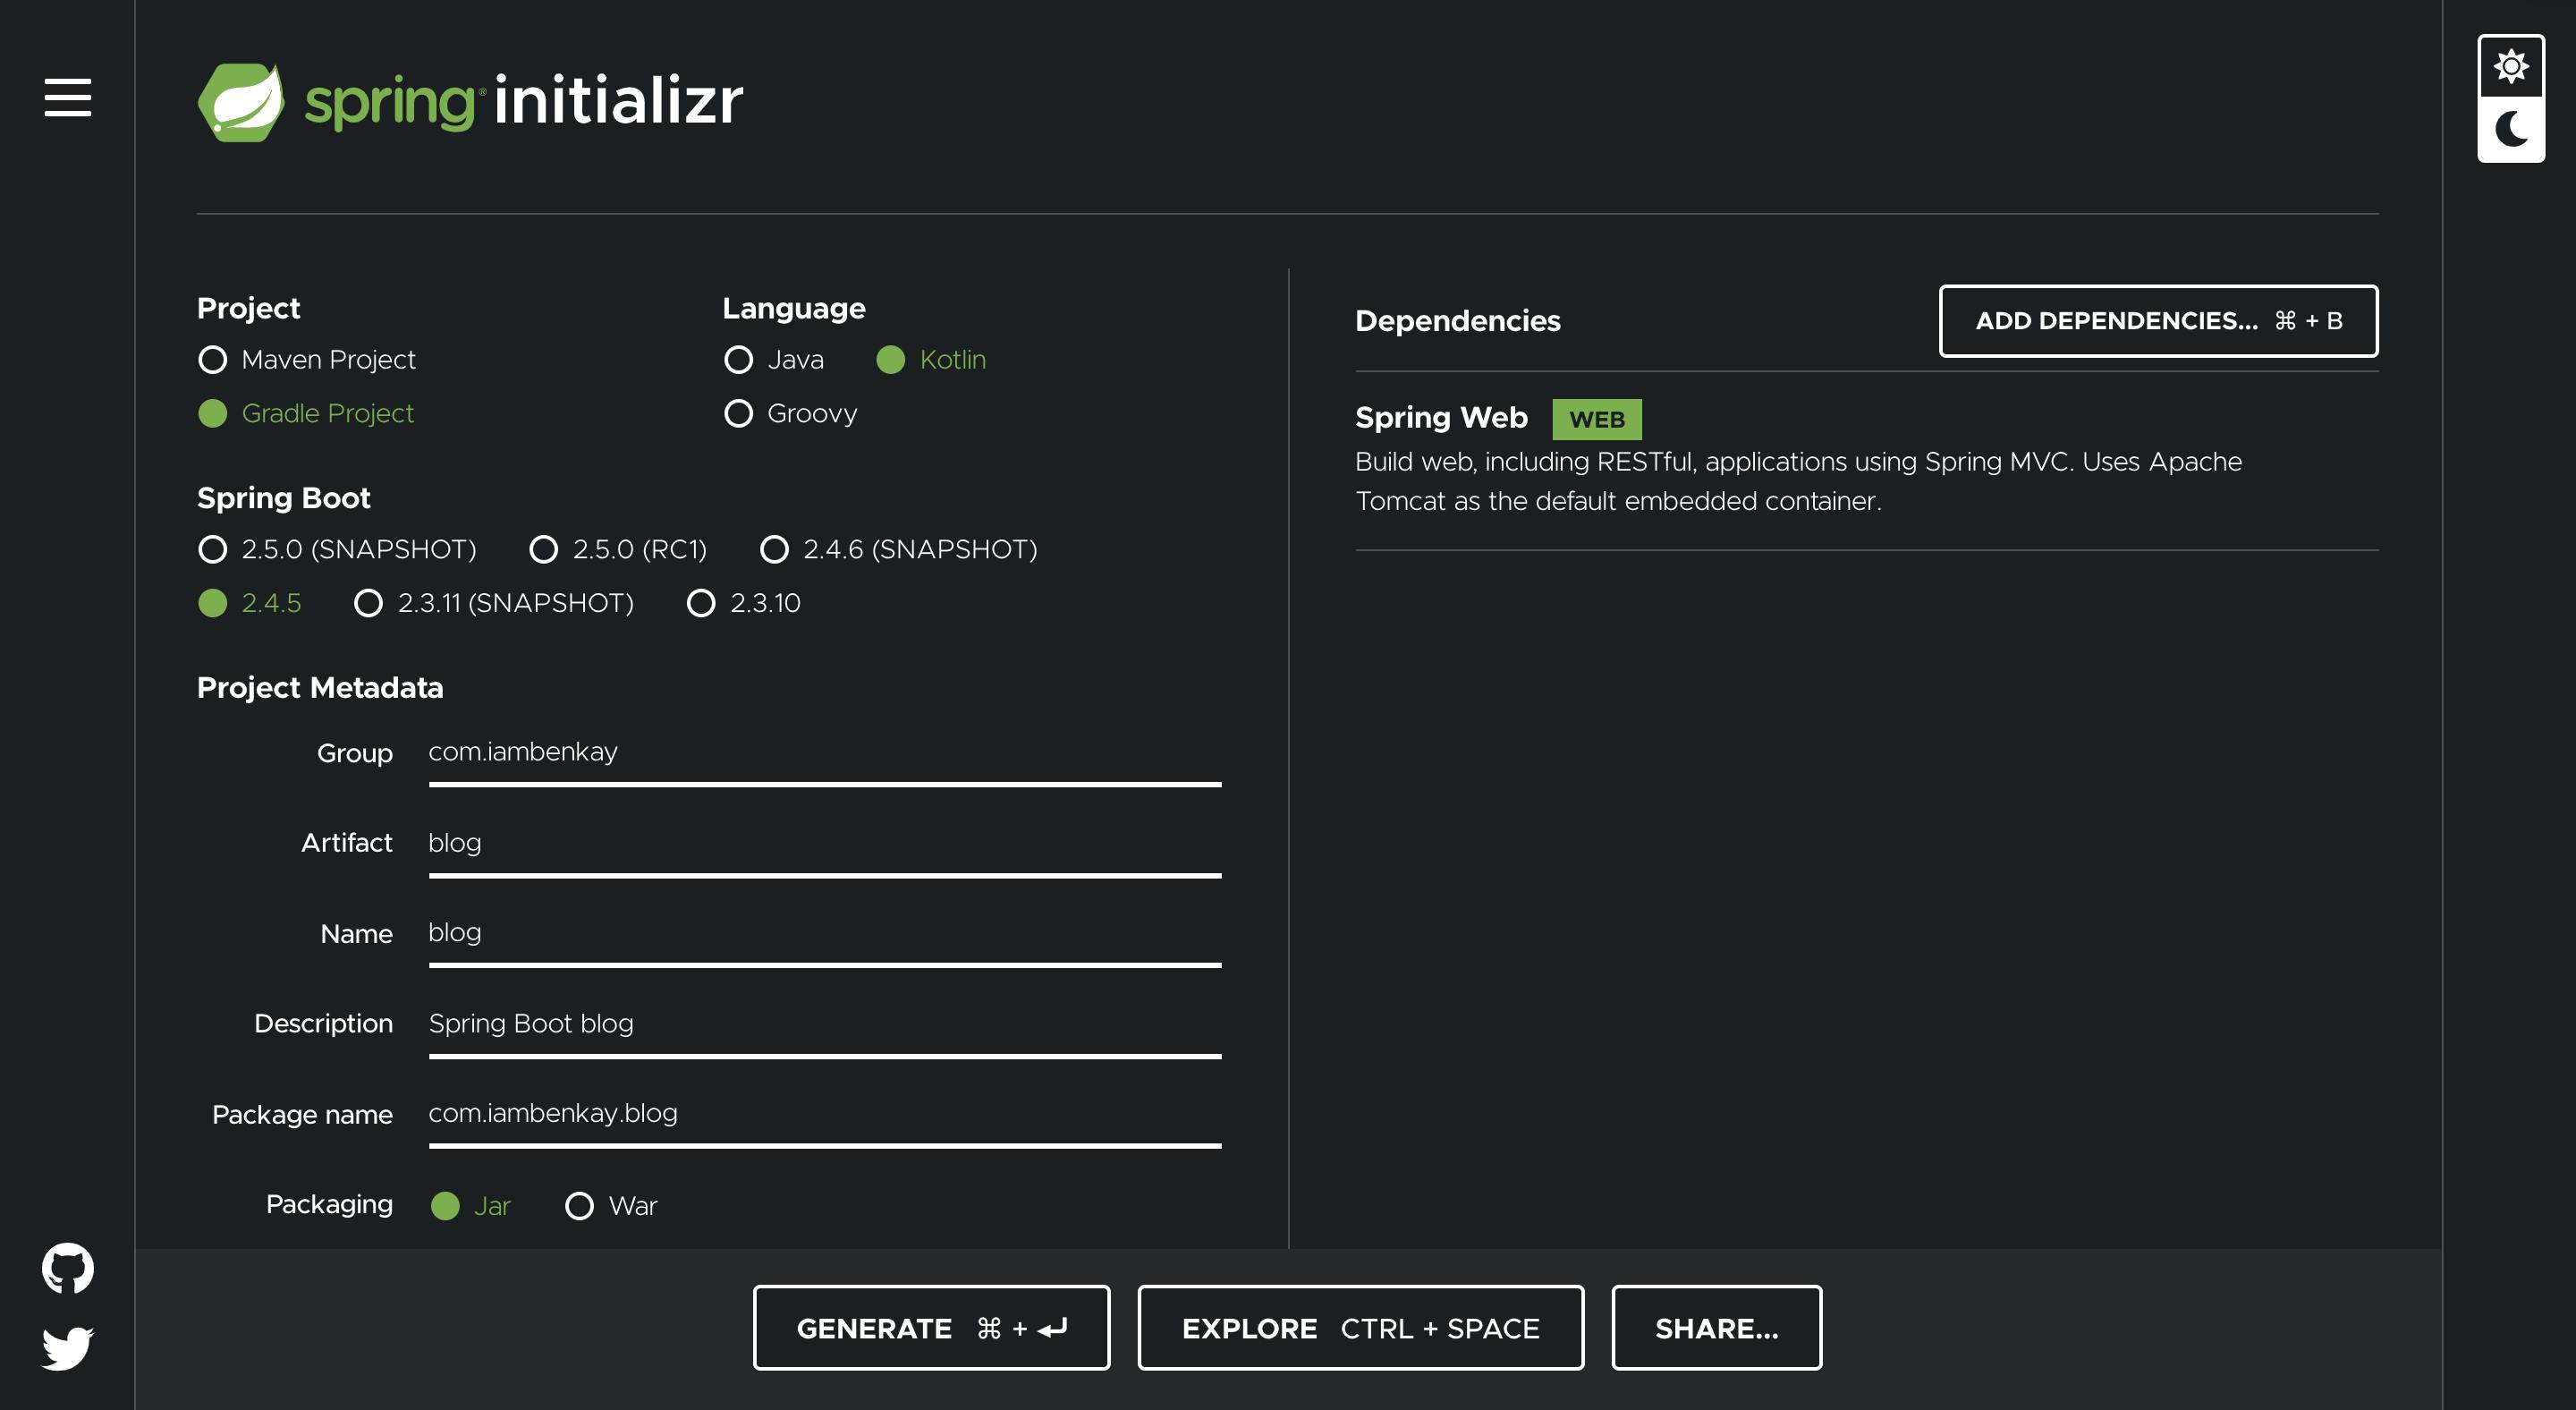
- Visit https://start.spring.io
- Under the
Projectflag, selectGradle Project - Under the
Languageflag, selectKotlin - Select
2.4.5as the project version - Define your project metadata
- Set packaging to
Jar - Click 'add dependencies... ⌘ + B', search for web and add the Spring Boot Web Dependency
Your configuration should look like this
To download it to your computer, click generate at the bottom of the page and it will try to download a zip file containing your boilerplate code.
You can click Explore at the bottom of the page to see the generated code before downloading it to your computer.
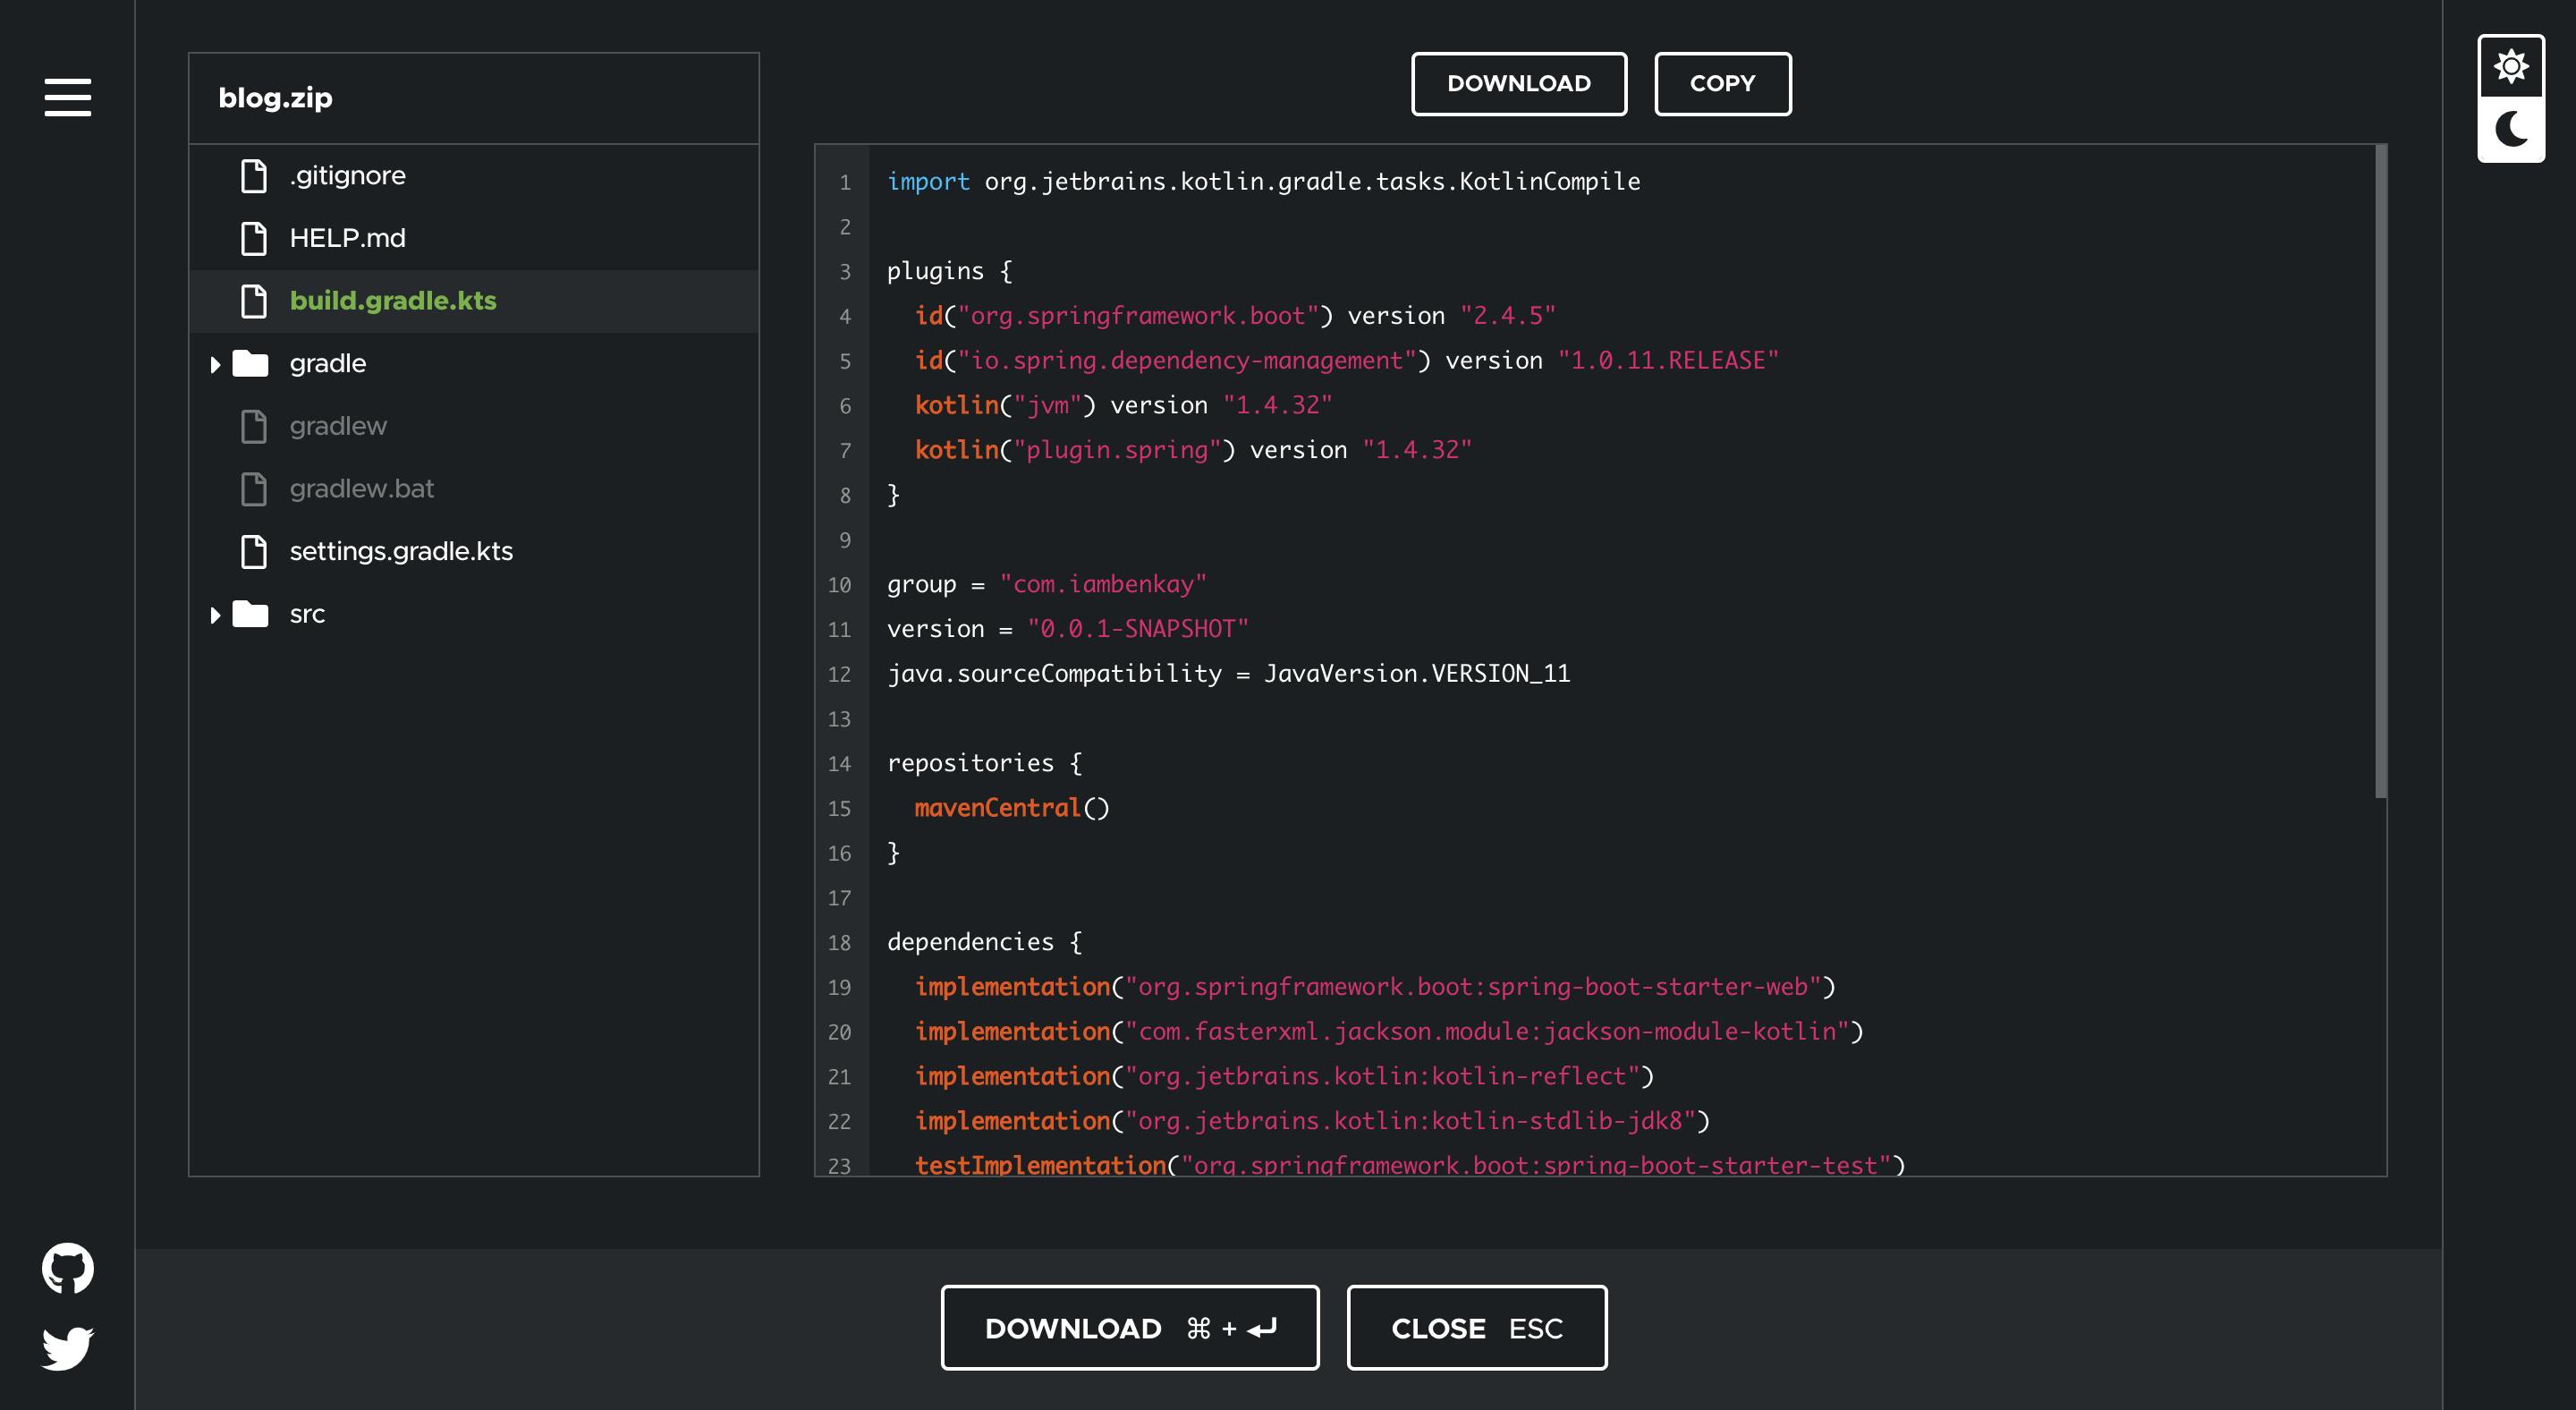
After downloading your project to your computer, open it up in a Kotlin compatible IDE (preferably IntelliJ) which is where we'll be writing all our code. After this, run a gradle build and we're good to go.
REST API CONCEPTS
if you're already familiar with REST APIs and how they work, feel free to skip this section else, pay attention.
A REST API is a kind of web service that represents resources using URIs and represents actions that can be carried out on these resources using HTTP methods. A description of a fictional library service should be a satisfactory example of a REST API.
In our fictional REST API, the URI /books references our resource for books in our web service. We can use several HTTP methods to perform different actions on this resource. Here are a few HTTP methods and their semantic usages in respect to REST APIs:
- GET - Retrieves resources represented by this URI
- POST - Create new resources represented by this URI
- PUT - Update existing resources represented by this URI
- DELETE - Deletes resources represented by this URI
These are the conventional usages of these HTTP methods and we will be using these conventions through out the series. Essentially the following will hold for our REST service:
- GET /books (should return books)
- POST /books (should create books)
- PUT /books/:id (should update books by id)
- DELETE /books/:id (should delete books by id)
If you feel like you want to go in-depth and fully understand what REST APIs are then check this out.
Spring Concepts
The spring framework makes use of two core JVM features to achieve its simplicity, JVM annotations and class path scanning. It scans the class path of the project, picks up annotated objects and uses that to wire up the web application.
Here is the entry point of our web service:
package com.iambenkay.blog

import org.springframework.boot.autoconfigure.SpringBootApplication
import org.springframework.boot.runApplication

@SpringBootApplication
class BlogApplication

fun main(args: Array<String>) {
    runApplication<BlogApplication>(*args)
}
You don't need to add this yourself, it's already been provided by https://start.spring.io. It's in src/main/kotlin/com/iambenkay/blog/BlogApplication.kt
Controllers
In Spring Boot controllers are used to group actions related to a particular URI in one place. In Spring Boot we define controllers like this:
package com.iambenkay.blog.controllers

import org.springframework.web.bind.annotation.GetMapping
import org.springframework.web.bind.annotation.PathVariable
import org.springframework.web.bind.annotation.RequestMapping
import org.springframework.web.bind.annotation.RestController

@RestController
@RequestMapping("books")
class BooksController {
    private val books = arrayListOf("Rich Dad, Poor Dad", "The Great Gatsby")

    @GetMapping
    fun retrieveBooks(): List<String> {
        return books
    }

    @GetMapping("{id}")
    fun getBook(@PathVariable id: Int): String {
        return books[id]
    }
}
The snippet above defines a new controller with a base URI /books. This controller is responsible for handling any requests in which the URI starts with /books. within the controller we annotate a method using the GetMapping annotation which ensures that the method responds to GET Requests coming into the controller. Since Spring picks it up automatically it is important that we don't annotate two methods with the same mapping and URI else Spring would be unable to know which method to send traffic to. The GetMapping annotation can also be passed a string which represents an extension of the controller URI. If for example GetMapping("summary") was passed instead then the method would only handle traffic for GET /books/summary. Notice, how we use {id} to represent a path variable and receive the value in our controller method. All standard Http Methods have mappings, just import {MethodName}Mapping from org.springframework.web.bind.annotation.
Ideally you should place all your controller classes in src/main/kotlin/com/iambenkay/blog/controllers. It's not compulsory but it is important to keep your code structured and organised. Spring knows that your class is a REST API controller when you annotate it with the RestController annotation. it picks it up at startup and knows to send traffic to your controller when that URI is visited. start up your Spring application from IntelliJ or from the command line using:
./gradlew bootRun
Now you can send a GET request to /books using POSTMAN or any HTTP client and you'd see the results returned to you.
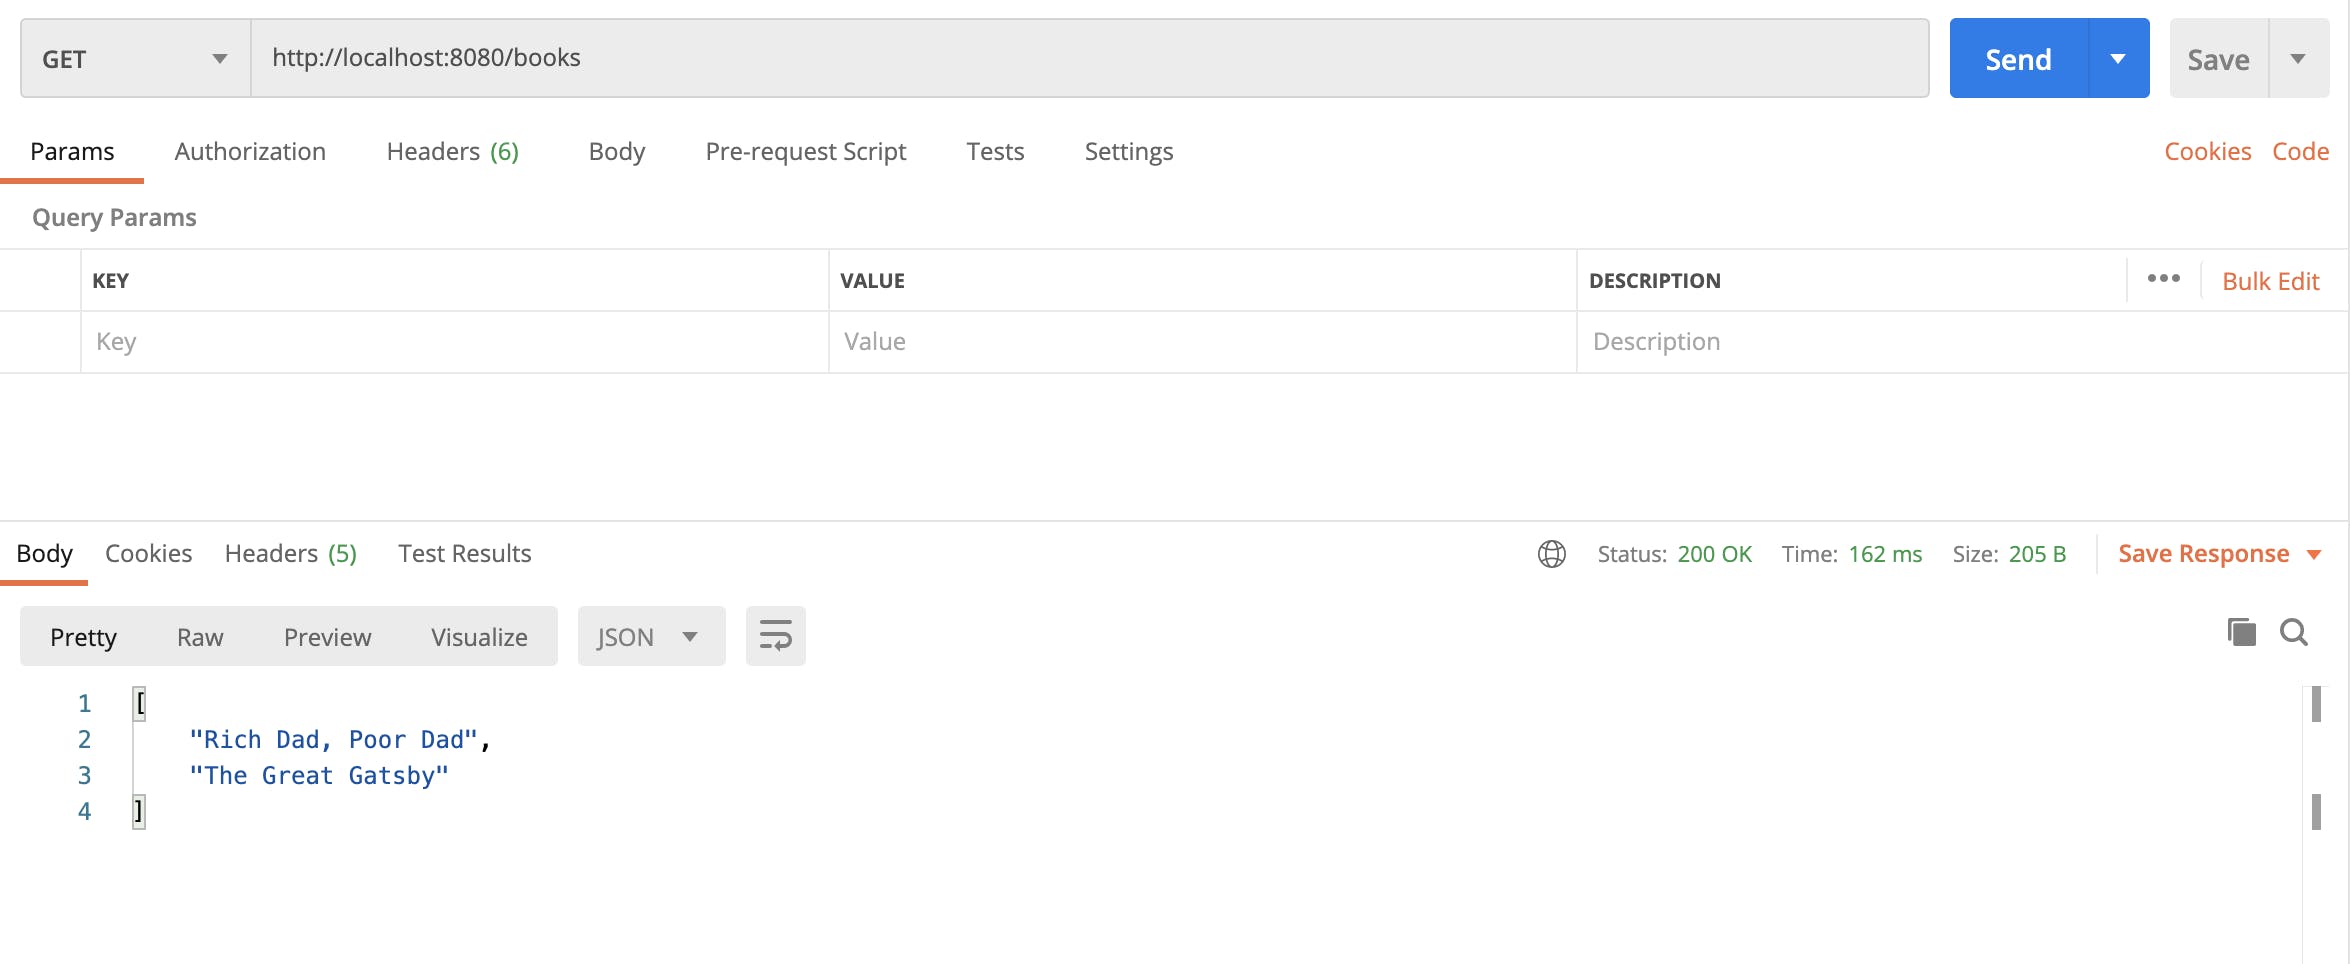
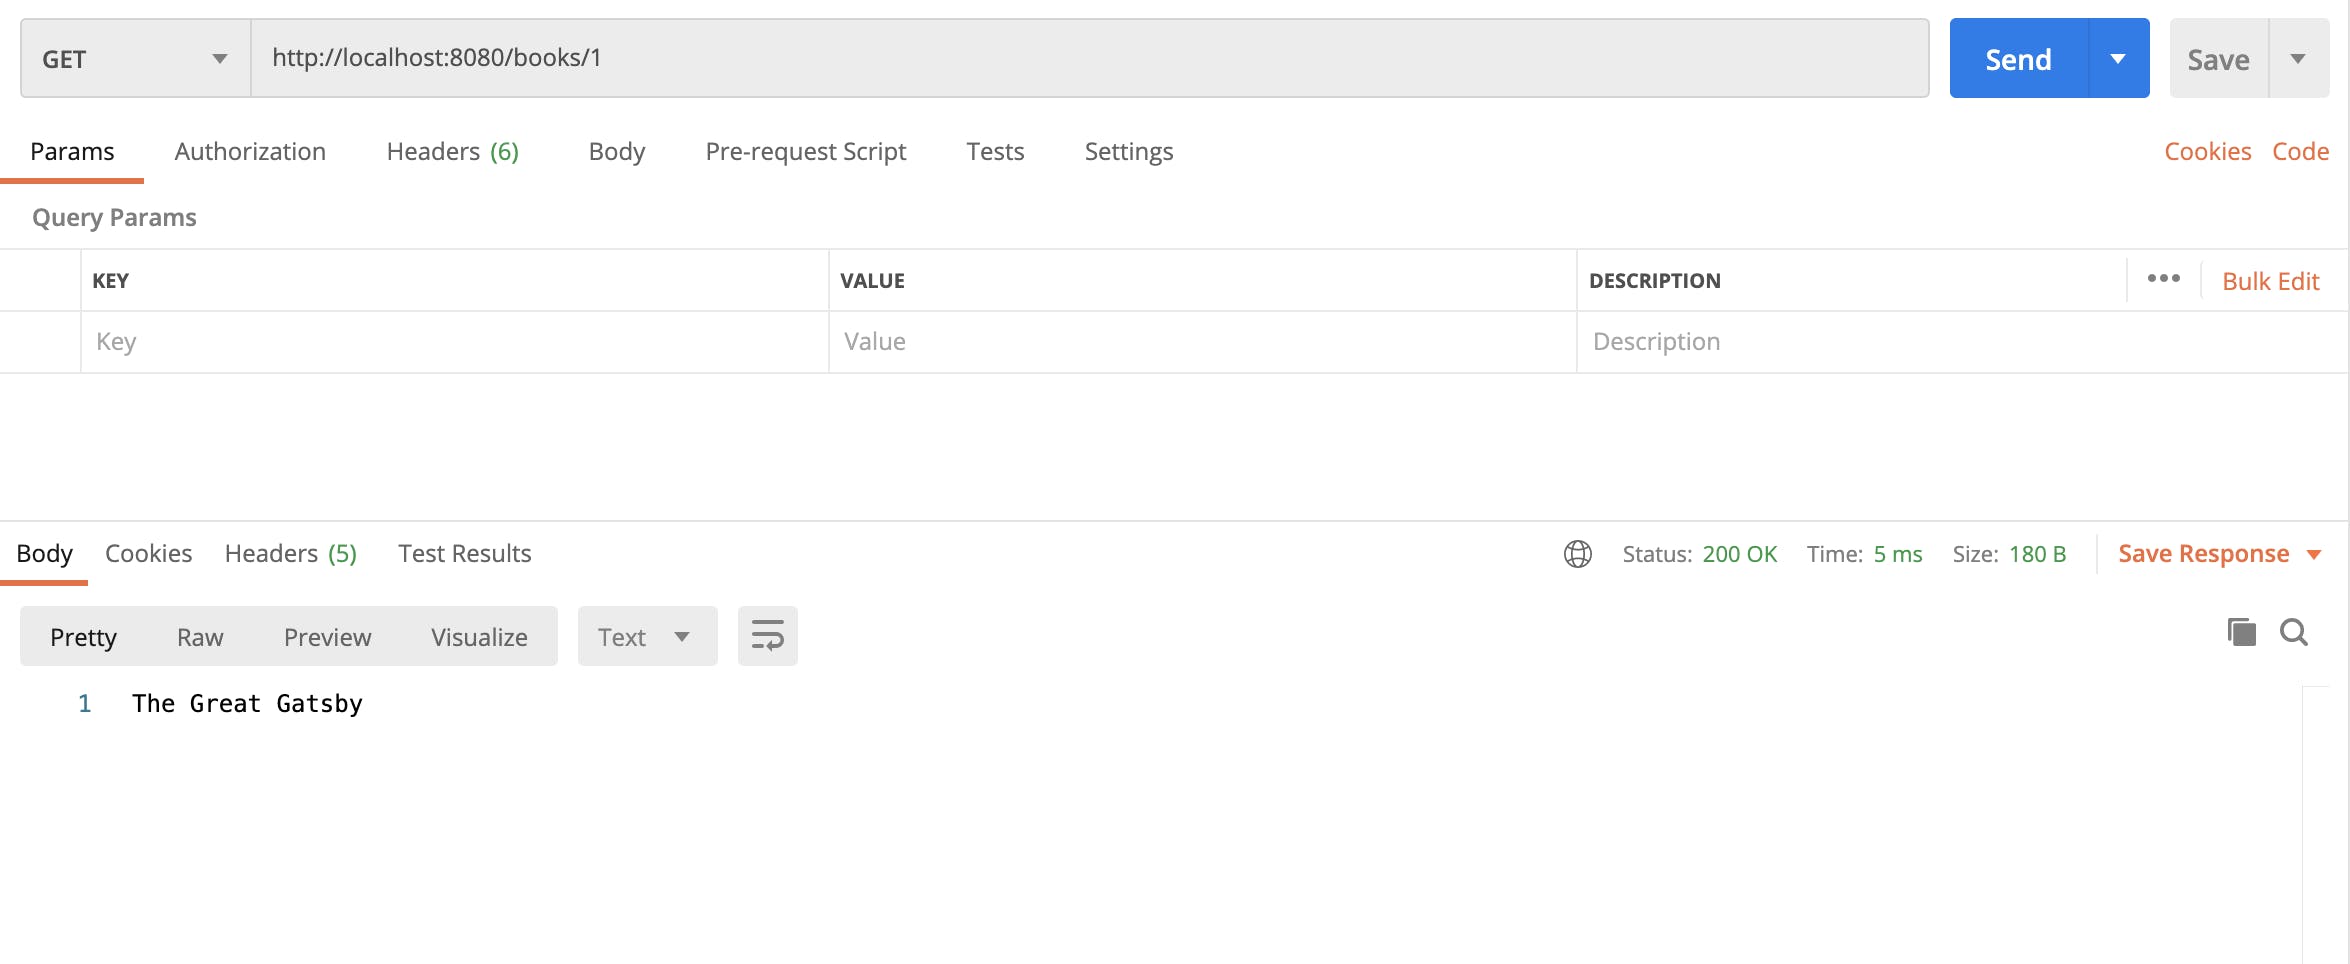
You can see how Spring Boot automatically infers the best content type for our data based on what we return from our controller methods. Our first API has been setup with Spring Boot and Kotlin 🚀